Showing posts with label classic. Show all posts

Saturday, June 27, 2009

0

Kuryakyn X-Tension Highway Peg Mount Review

Kuryakyn X-Tension Highway Peg Mount Review

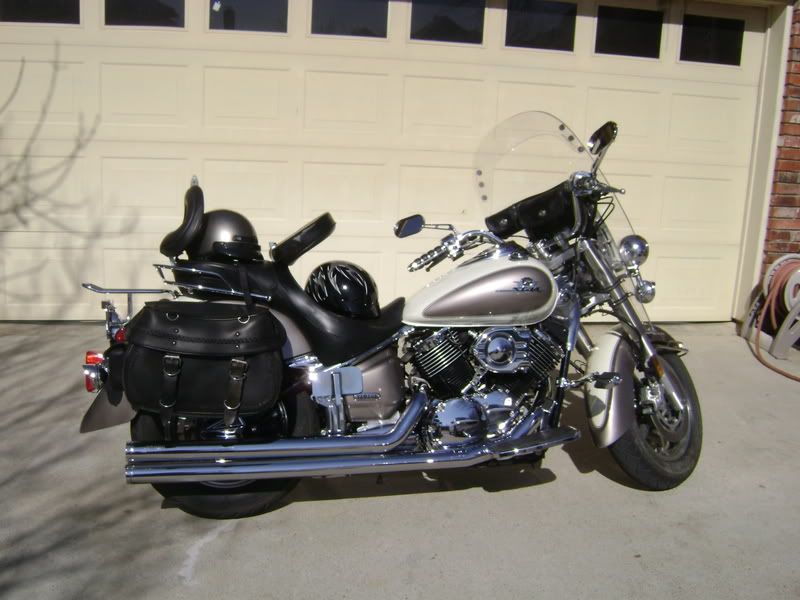
One of the first modifications I did to my V-Star 1100 Classic “Mistress” was to add some front pegs. At 6’2” I needed a way to stretch out my legs on longer rides. I had really wanted to get some Lindby Custom Linbars, still do, but funds were not available. So I started looking at front pegs to add to my bike to stretch out and rest my tired dogs on.

In researching for front pegs I decided I wanted some that could be folded up out of the way when not in use, rather than the stationary kind. Looking online I ran across the Kuryakyn X-Tension Highway Peg Mounts on the Kuryakyn website. I think I looked there because several other add-ons on my V-Star were from Kuryakyn. I honestly don’t remember where I ordered them from, but I ordered them online from an online store that had a good price. They arrived safely packed in foam peanuts several days after they were ordered.

The Kuryakyn X-Tension Highway Peg Mounts measure 4 ½” long and have a 1 ¼” offset which allows the reach adjustment to be fine tuned for the rider. The metal is really stout and fully chromed. Another feature I really liked was that the actual foot landing pad is thicker on these pegs, not being just a post. This gives the foot more purchase area. The pad is also equipped with floating rubber grip strips. These peg mounts allow for the peg to be folded up when not in use.

Installation is straight forward and required no special tools, just normal SAE sockets or wrenches most folks have in their garage. Here we go again with SAE nuts and bolts for a metric bike. I mounted them right onto the front frame down-tubes. They have to be mounted high enough up that they do not interfere with the operation of the rear brake pedal on the right side and the shifter on the left. Do not forget to use the included locking washers.

The hardest part about installation is getting them mounted evenly from side to side on height and angle. You also have to tighten the bolt at the pivoting point to the right tension so that they will stay up when put up. It probably took less than an hour to install them.

Having an extra place to put your feet on long ride is well worth it. With my backrest on the Corbin seat and my feet up I feel like I am riding a recliner down the freeway. You can use the pegs with the toe or heel of your shoe or boot. Alternatively, you can just rest the whole back of your foot up on top of the peg. This gives you multiple choices on long rides when you need to move around for comfort.

I have not had any issues with the Kuryakyn X-Tension Highway Peg Mounts. I will warn you Chromaholics that it is painstaking to clean the tops of the pegs between the rubber traction inserts. I have found the easiest way is to use the very edge of a soft cleaning towel. You have to go back and forth like you are shining shoes, between the rubber inserts. Torch gives the Kuryakyn X-Tension Highway Peg Mounts a M.M.M. rating of 9.5.

Ride on,
Torch


Reblog this post [with Zemanta]


Wednesday, February 18, 2009

0

Fiamm Freeway Blaster Horn Installation & Review


Alternate Title: Torch’s First V-Star Mod/Upgrade

Before I started using my ’03 Yamaha V-Star 1100, I wanted to give her a good "T-CLOCS" inspection. I learned about the "T-Clocks" pre-ride checklist when I took the Motorcycle Safety Foundations Basic Riders Course. You can download your own "T-CLOCS" checklist to print and use here.

"T-CLOCS" Stands for:

T-Tires & Wheels
C-Controls
L-Lights
O-Oil
C-Chassis
S-Stands

While performing this inspection I noticed what I feel is a shocking omission on the MSF’s pre-ride inspection list. I could not find the horn listed anywhere. I even used the PDF file document search and it came up empty, so I knew it was not just my oversight. If you use their list I suggest adding, "Horn if equipped," under the lighting or control section.

So, I performed my "T-CLOCS" pre-ride inspection and hit the horn button. Mistress, (my nickname for the motorcycle,) let out a soft, timid "meep" sound. I laughed out loud. Then I remembered a real humorous thread on the V-Star 1100 Riders Forum about the 1100’s apathetic Original Equipment Model horn. Someone on the forum actually coined the sound that the OEM horn makes on a V-Star as "meep". I did not think much more about it at the time.

After commuting to work for a couple of weeks in stop and go D/FW traffic, I had to opportunity to use the horn. It was the classic cage changing into my lane without looking. For those who do not know, a cage was a vehicle driving on four or more wheels. I hit the horn button on this big, bad, Yamaha, V-Star, 1100cc monster of a bike I was riding and it responded with the anemic "meep" sound. I’m not sure the sound was even audible over all the traffic noise. I could sense the other drivers around me laughing. I knew then it was time to change out the OEM horn. It had, in fact, become the first thing that I wanted to change on the bike.

Not long after that I found myself in the local Pep Boys Auto store looking at replacement horns. I saw the Fiamm Freeway Blasters and grabbed a Low Note Horn. I figured the low note would give a larger sound, which was definitely what I wanted. I got home and read the simplistic directions. I also referenced the V-Star 1100 Riders Knowledge Base in the Horn section. It appeared that it was pretty much plug-n-play. Always remember, appearances can be deceiving. Your mileage may very, as they say.

I went to the garage and started the install. The first thing was to remove the pathetic OEM horn. It had only one bolt attaching it to the upper frame between the down tubes. Once unbolted, I pulled the electrical connector off the OEM horn and it was now off the bike. That part was easy enough.

I then compared the two horns. There were a couple differences. One was that the Fiamm Freeway Blaster wiring connectors were a lot farther apart than the OEM horn connector. I thought about this dilemma and decided I could do one of two things. I could cut the OEM plastic connector in half down the middle, or fabricate a jumper harness using spade lugs and wire. I reached for my favorite knife clipped in my left front pocket and carefully cut the wiring connector in two. My favorite knife was a Kershaw Leek Speed-Safe Assisted Opening Knife my wife had given to me for Christmas. I figured it would be less obtrusive than reaching into my right front pocket and pulling out my Kel-Tec P3AT .380 and just blasting the connector.

The second difference is that the Freeway Blaster horn is larger that the OEM horn. I held the Fiamm supplied bracket up to the bike mounting spot and noted that it was too short. Then I noticed the bracket on the OEM still attached to it. So, I removed the OEM bracket from the OEM horn and held it up with the Fiamm Horn to the V-Star. The bracket went the wrong way and the horn would not fit properly. I scratched my head, flipped the OEM bracket upside down and held the Fiamm horn back up to the bike. It looked like it would work.

I attached the OEM horn bracket upside down on the Freeway Blaster. Then I attached it to the bike, bending the bracket slightly to position it correctly. I hooked up the electrical connectors I previously had set free to the new horn. I turned the key on and hit the horn button. Now it sounded like a real horn with a much deeper sound. It was not supper loud, but was definitely louder than the OEM. You can hear a sound clip at the Fiamm website here.

I noticed that the Fiamm horn protrudes out farther than the OEM. I had read of people installing horns on motorcycles and not allowing for the fender travel. This would lead to the fender hitting the horn and damaging the paint or fender. So, as a precaution, I made one more modification to the Freeway Blaster. I took a hacksaw to the front plastic portion of the horn that sticks out and lopped it off. Now I was done.

As far as a review the Fiamm Freeway Blaster Low Note Horn works as advertised. I’ve had it on for a year now and works when called upon. Eventually I want to also install an air horn on my Mistress. Torch gives the Fiamm Freeway Blaster a MMM rating of 8 on a scale of 1-10.

Ride on,
Torch
Reblog this post [with Zemanta]

Saturday, February 14, 2009

0

My Mistress

My Mistress is my motorcycle. It was time to take stock of what all this bike had on her. I believe that I am the third owner and the previous owners had really decked her out. It was a 2003 Yamaha Star V-Star 1100 Classic with 26,000 miles on it. Although a Classic model, She looked more like a Silverado because of all the accessories. Every time I looked at it I discovered something new. I had been keeping a running tally of all the accessories for quite some time and here is the list as best as I can discern, not in any particular order:


SS Customs Mid Range 420 Cam Kit (includes: Chubby Air Kit, Needles, and Jets)

Jardine Chrome Oil Filter Relocation Kit

Progressive Front Fork Springs

Progressive Rear Suspension Spring

Corbin Dual Touring Seat with Front & Rear Removable Backrests

Audiovox CCS100 Universal Vacuum Cruise Control

Kuryakyn Hypercharger for V-Star 1100 (vacuum is hooked up, but just for looks)

Kuryakyn ISO Grips

Kewl Metal Kewlock Grip End Helmet Locks

Star Motorcycles Floorboards with Heel & Toe Shifter

Kuryakyn Chrome Floorboard Covers

Star Motorcycles Billet Brake Brake Pedal Cover

Star Motorcycles Rear Luggage Rack

Barons Customs Sport Board Adjustable Passenger Floorboards

Star Motorcycles front Light Bar

Star Motorcycles Headlamp, Front Passing, and Front and Rear Turn Signal Visors

Clear Alternatives Clear Front Turn Signal Lenses & Amber Bulbs

Clear Alternatives Smoke Rear Turn Signal Lenses

Radiantz LED Rear Turn Signal Conversion Kit

Kuryakyn 7" Halogen Headlight Wave Cut Tri-bar with Black Dot

Kuryakyn Chrome Brake Master Cylinder Cap

Chrome Rear Brake Fluid Reservoir Cover

Kuryakyn Magnum Plus Mirrors

Kuryakyn Billet Chrome State Inspection Plate

Cobra Speedster Longs Exhaust

Memphis Shades Windshield


Memphis Shades Lowers

Laminar Lip on Windshield

Leather Three Pocket Windshield Bag With Braiding

Star Motorcycles Front Fender Trim Bumper

Custom Classic Hard Leather Bolt On Saddle Bags with Braid & Pocket

Easy Brackets Saddle Bag Quick Detachable Brackets.

Kuryakyn Chrome Neck Covers

Clocks 4 Bikes Chrome Handlebar Clock, Original Mount with White Faceplate

Clocks 4 Bikes Chrome Handlebar Thermometer, Original Mount with White Faceplate

Kuryakyn Chrome Mid-Frame Cover

Kuryakyn Lighted License Plate Frame

Kuryakyn Chrome Boomerang Frame Trim

Kuryakyn Chrome Handlebar Control Covers

Show Chrome Celestar Rear Brake Master Cylinder Cover

Kuryakyn Phantom Swingarm Chrome Cover

Avon Venom-R Tyres


Here is the list of things I have added or upgraded since I purchased her:


Replaced the OEM horn with a Black Fiamm Freeway Blaster Low Note Horn

Binetto YTX14-BS High Performance AGM ATV/Motorcycle Battery

Stebel Nautilus Compact Chrome Air Horn

Kuryakyn X-Tension Pegs

Replaced front Avon Venom-R Tyre with Metzler ME 880 Marathon

Replaced worn/missing Star Motorcycle Billet Brake Pedal Cover Rubber Inserts

Replaced one Cobra Dragster Long Exhaust tip, lost while riding

Battery Tender Connector to battery for Battery Tender Jr.


I will be writing reviews and stories of these projects and upgrades in the future. I will also be reviewing the riding gear I have picked up and used along the way.


Ride on,

Torch

Reblog this post [with Zemanta]